
Facebook Pixel Setup
The Facebook Pixel is a free tool that helps businesses measure the effectiveness of their Facebook ads by tracking the actions people take on their website. It is a piece of code Facebook generates, that you copy/paste into your website’s HTML code. Once installed, the pixel will track events such as page views and conversions. This data can then be used to create targeted ads, measure the ROI of your campaigns, and improve your website's conversion rate.
Why do I need a Facebook Pixel?
Here are some of the things you can do with the Facebook Pixel:
Create website custom audiences: You can use the pixel to create audiences of people who have visited specific pages on your website, or who have taken certain actions, such as adding an item to their cart. These audiences can then be used to target your ads to people who are more likely to be interested in your products or services.
Track conversions: The pixel can track purchases, form submissions, and phone calls among other events. This data can be used to measure the ROI of your campaigns and to improve your website's conversion rate.
Optimize your ads: The pixel can help you optimize your ads by showing them to people who are more likely to be interested in them. You can also use the pixel to create look-alike audiences, which are groups of people who are similar to your existing customers.
Retarget your website visitors: You can use the pixel to retarget your website visitors with ads. This is a great way to remind people about your products or services and to encourage them to come back to your website.
How do I set up a Facebook Pixel?
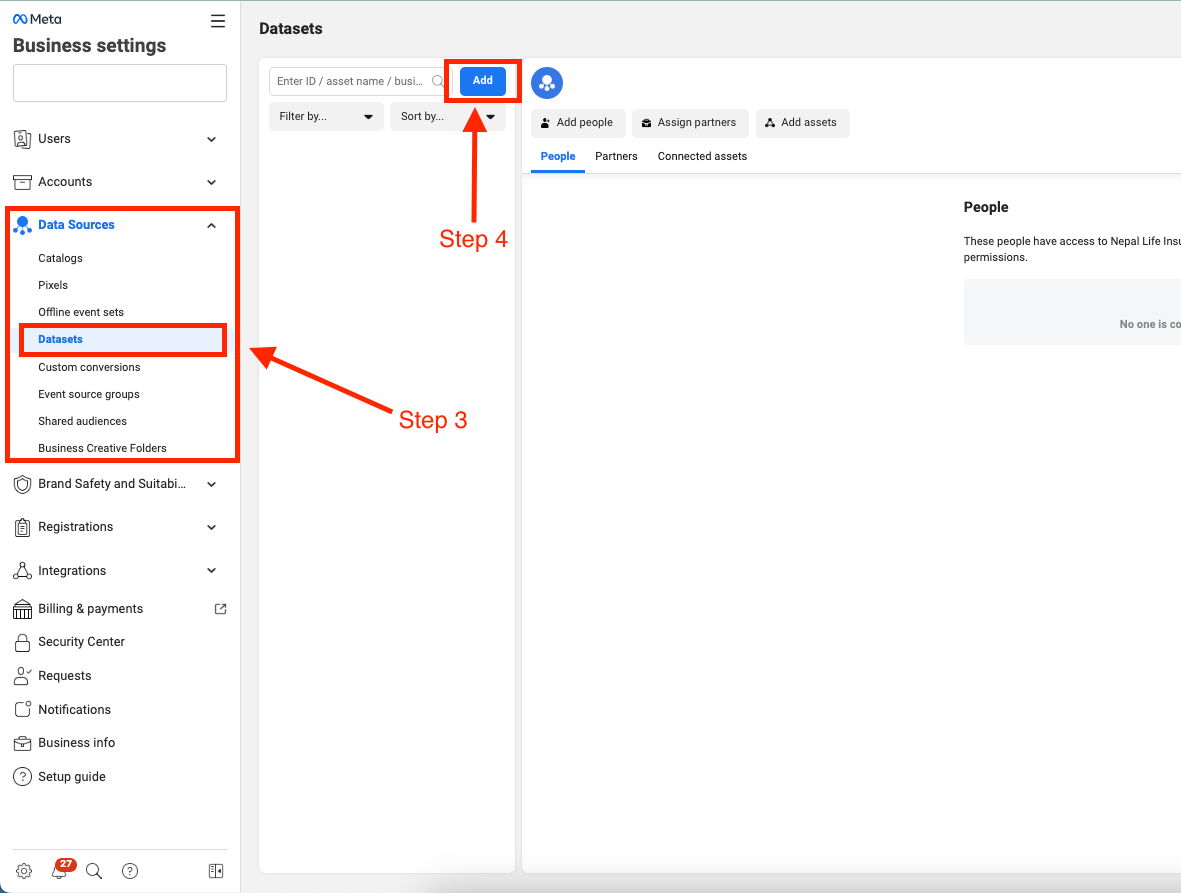
Go to Facebook Business Manager (business.facebook.com)
Click the Settings gear button at the bottom left
Go to Datasets in the Data Sources section. (You may need to click Data Sources to get Datasets to appear)
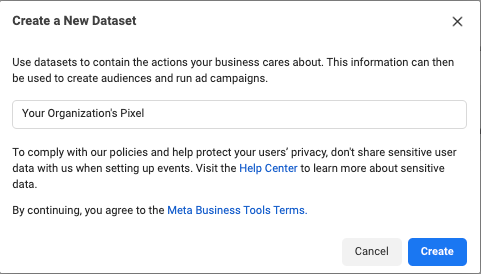
Click on Add, then Create a new dataset
Provide a name for the dataset and click Create
Once the dataset has been created, click on Open in Events Manager on the top right of the page

A new tab will open where you will see the current status of the newly created dataset
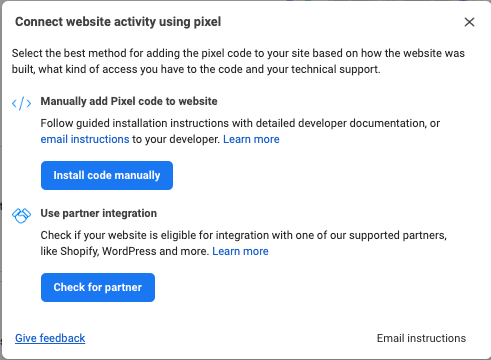
Select the Setup Meta Pixel method from the list available

On the next pop up, click Install code manually. (You can also directly send the codes to your IT team by clicking on the email Instructions link and skip this portion of the tutorial.)
On the next Events Manager Onboarding page, follow the 3 steps carefully
1️⃣ Copy the base code and paste it into the </head> tag of your website
2️⃣ Turn on Automatic Advanced Matching and click Continue.
3️⃣ You can skip Add Event Code and Click on Go To Pixel Overview.

You’re all done!
How do I grant Facebook Pixel access to RAIN?
Go to Facebook Business Manager (business.facebook.com)
Find and click the Settings gear button at the bottom left
Go to Datasets in the Data Sources section. (You may need to click Data Sources to get Datasets to appear)
Find your Facebook Pixel, select it, then click on Assign partners

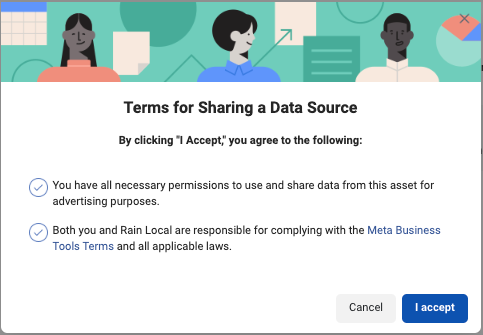
Enter RAIN’s business ID (1371760926184551) in the pop-up window
Turn on Full Control, then click Next

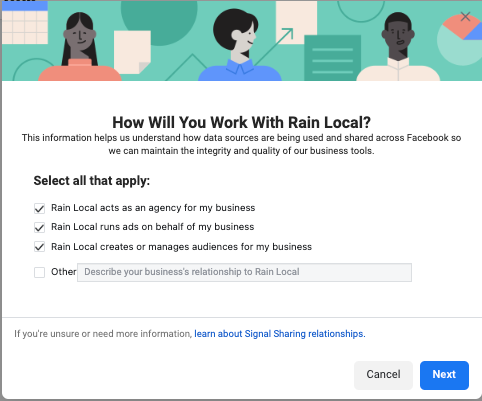
On the next screen, select all that applies and click Next.
Finally click I accept, and your invitation will be shared to our Business Account!
Please let us know once you’ve completed these steps so we can accept your invitation on our end and make sure everything is working properly.
Thank you!