
[Google Ads] How To Upload a Customer List
Sign in to your Google Ads account.
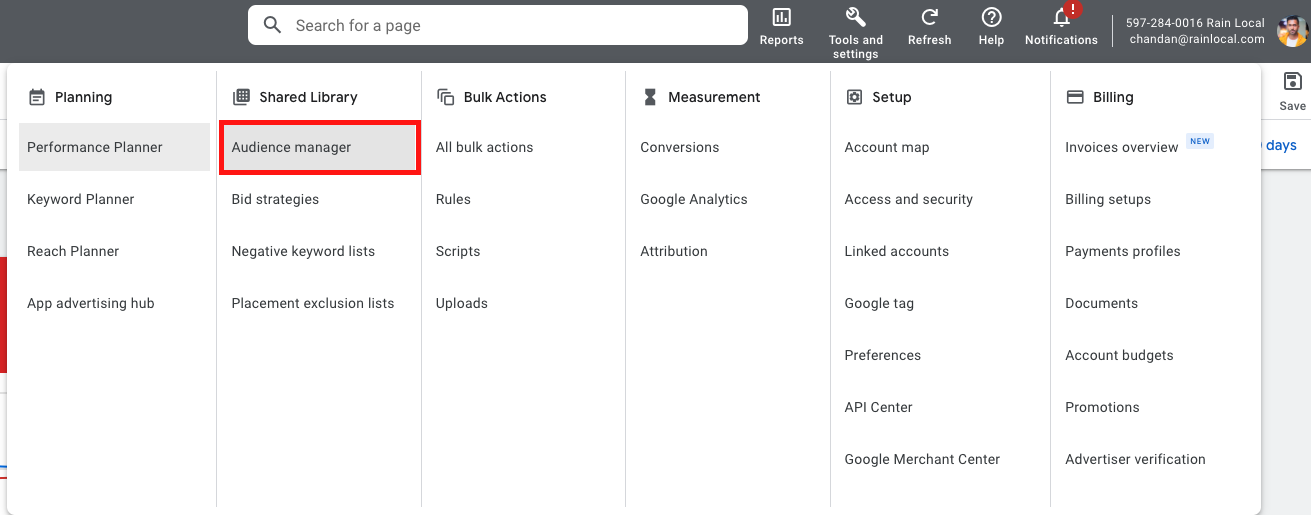
Click the Tools and Settings icon.
In the Shared Library section, click Audience manager.
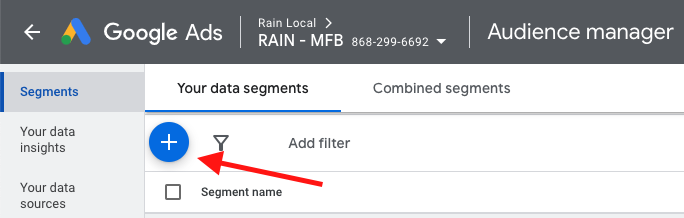
Click the Segments tab.
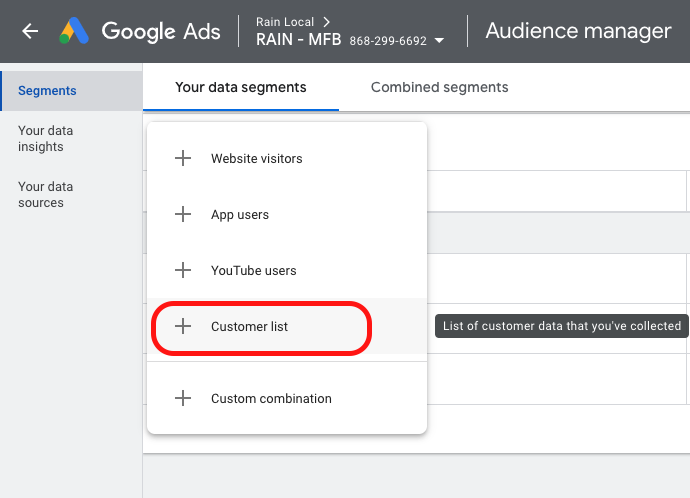
Click the + button and select Customer list.
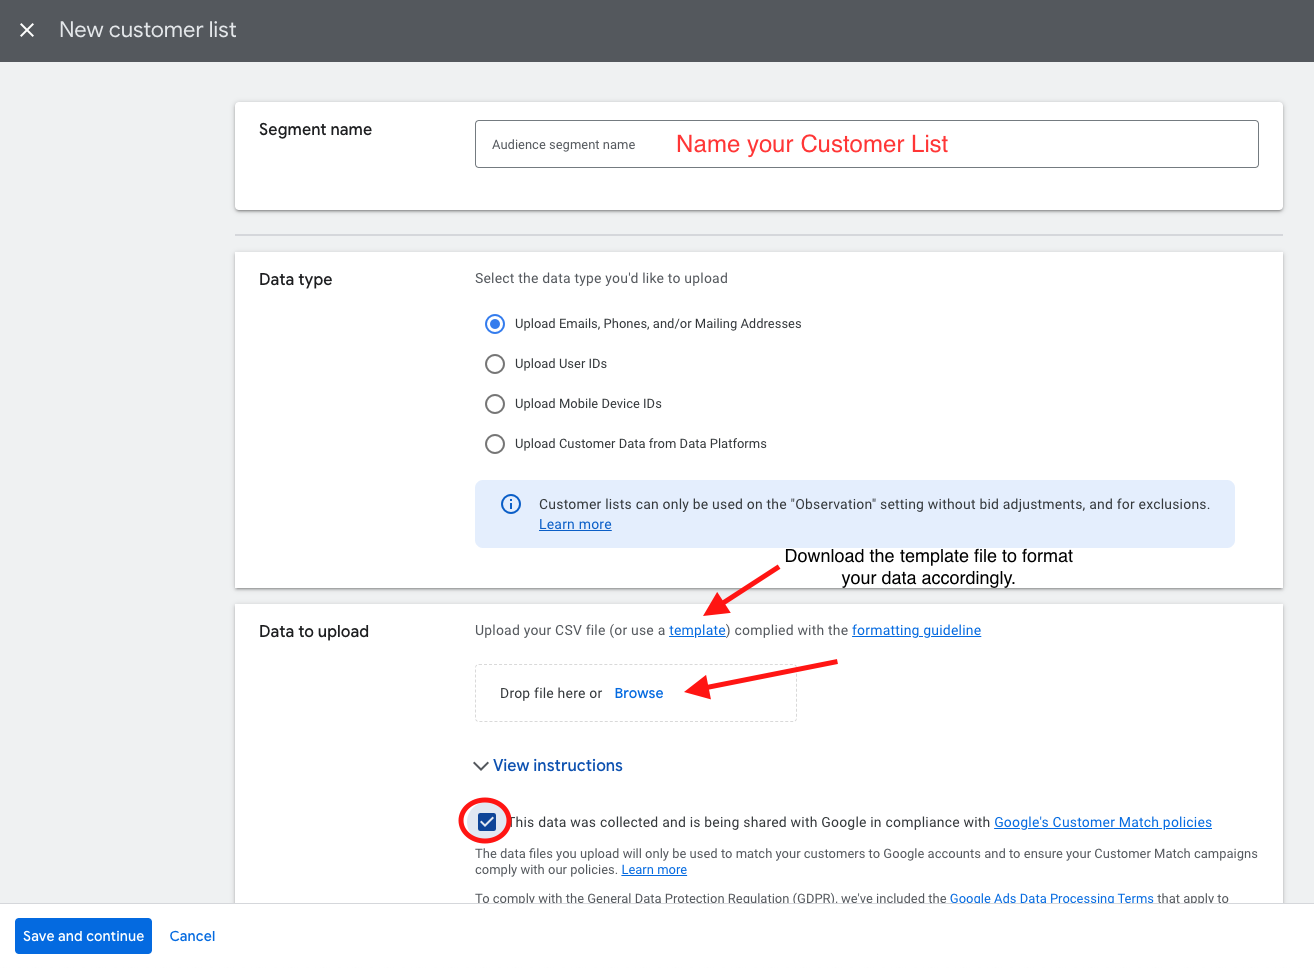
Enter a name for your customer list.
Select whether you want to upload a plain text data file or a hashed data file. Whichever type you choose to upload, your file must meet the following requirements:
The file must be in CSV format.
The first row of the file must contain the column headers.
The only required column header is “Email”
If uploading hashed data, there are some additional requirements for your file’s formatting:
remove any extra spaces in the fields (before, within, and after the address text)
Lowercase all characters
Other column headers can be included if you have additional data points, such as any of the below. Please reference the formatting guidelines link on the page itself for those requirements.
Phone
First Name
Last Name
Country
Zip
Mobile Device ID
If you are uploading a plain text data file, check the box "This data was collected and is being shared with Google in compliance with Google's Customer Match policies."
Optionally, you may set a membership duration for your customer list. The default membership duration is unlimited, but you can set a custom time limit.
Click Save and continue.
You’re all done! The process of uploading your customer list may take up to 24 hours to complete. Once your customer list has been uploaded, you can use it to create targeted ad campaigns in Google Ads.
Thank you!