Facebook Domain Verification
Why do I need to verify my domain?
Domain Verification is a method of claiming ownership of a domain on Facebook. This ownership allows you to control editing privileges of your links and other content, preventing misuse of your domain.
Verifying your domain with Meta confirms ownership and lets us properly configure your conversion events for iOS-related tracking rules.
Here’s a link to Meta Business Center’s article about domain verification.
How do I verify my domain?
First, check to see if your domain has already been verified:
Go to Facebook Business Manager (business.facebook.com)
Click the Settings gear button at the bottom left
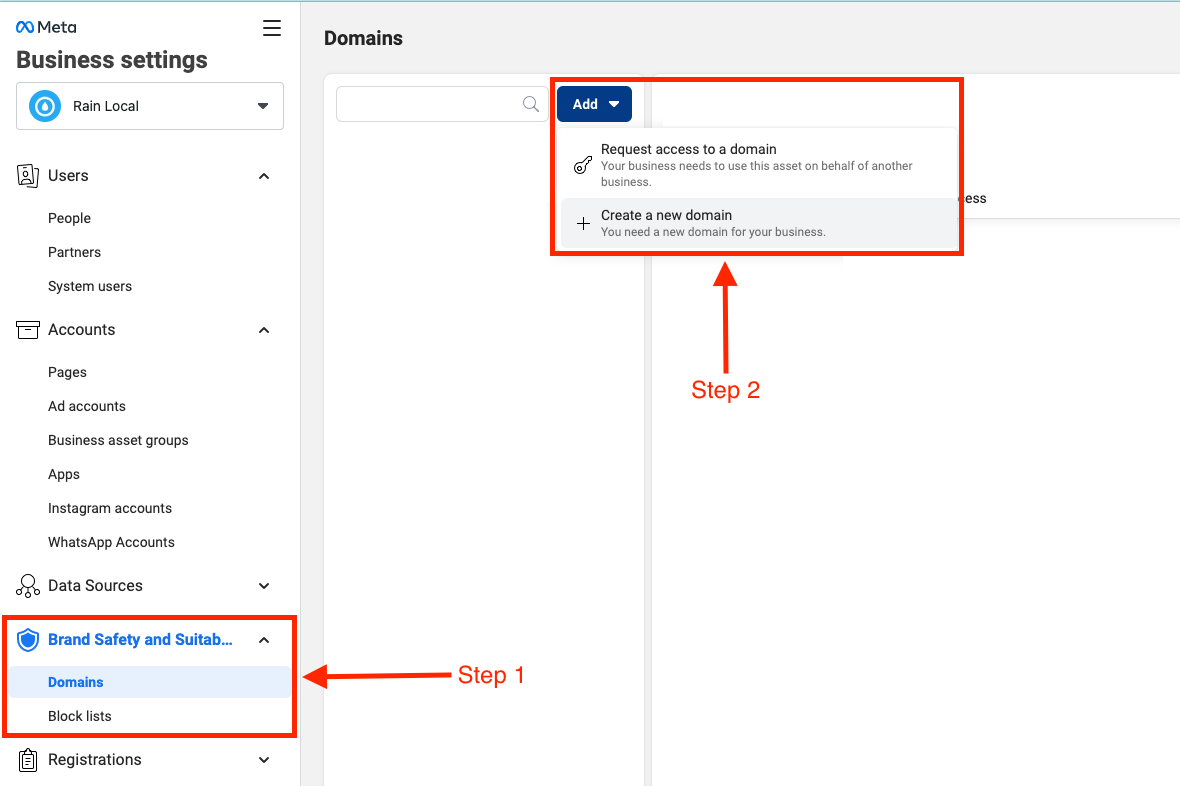
Go to Domains in the Brand Safety and Suitability section. (You may need to click Brand Safety and Suitability to get Domains to appear)
If your domain has already been verified, you will be able to see it listed under the search bar in the Domains section in the screenshot below, and it should say “verified.” In this case, we just need you to share it with us! Go to How do I grant domain access to RAIN? below.
Important Note: Completing the steps below will either require the ability to edit the HTML code of your website or, for our preferred method, the ability to add a DNS record on your Domain Registrar. You will need to make sure you have the right account access, or else you’ll need to recruit help from somebody who does.
Click on Add, then Create a new domain
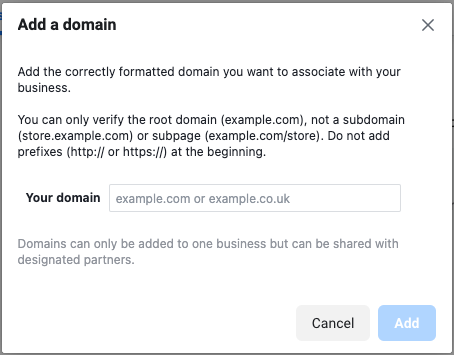
Fill in your domain in the dialog box, then click Add
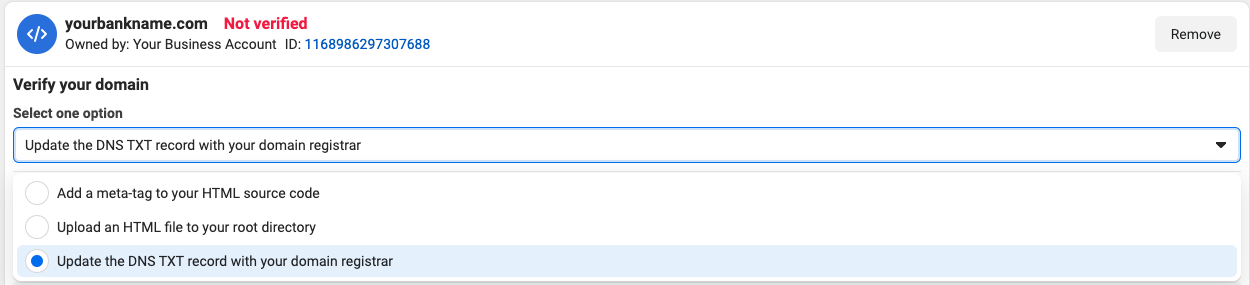
Select any of the 3 verification methods. No one method is best, but the 3rd option, Update the DNS TXT record… is probably the simplest. We’ve included instructions for that method below. You may still opt to use either of the first 2 options instead if you know how.
Important Note: As mentioned earlier, to follow the steps below, you will need access to the platform your domain is managed on (i.e. Domain Registrar).
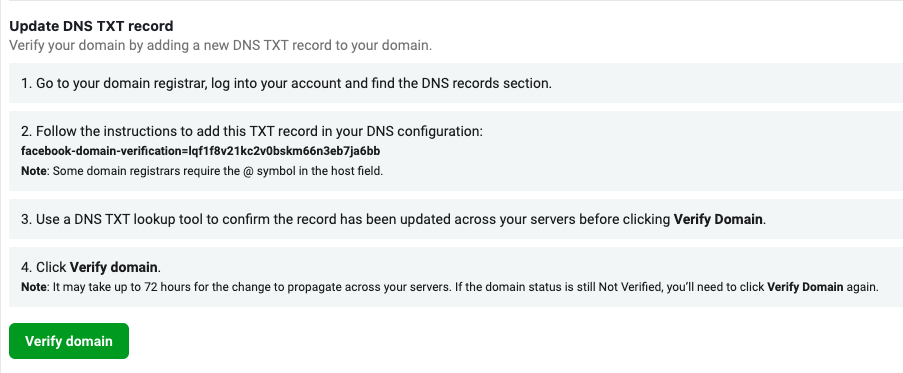
Once you select Update the DNS TXT Record with your domain registrar, you will be provided with a unique TXT Record.
Note: Do not click ‘Verify domain’ at this point.
Open a new tab and log into your Domain Registrar.
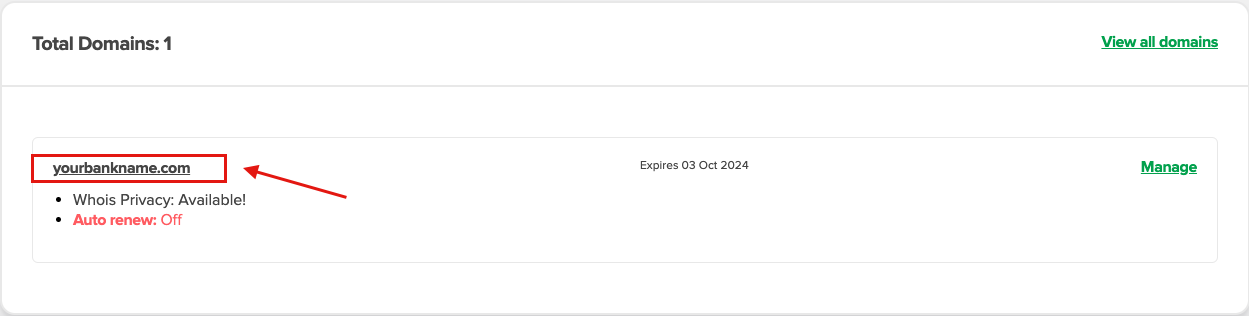
Note: We are using Name.com as a Domain Registrar in this example, but the steps will be similar across most domain registrars.Find your domain and click the link to view its management page or control panel.
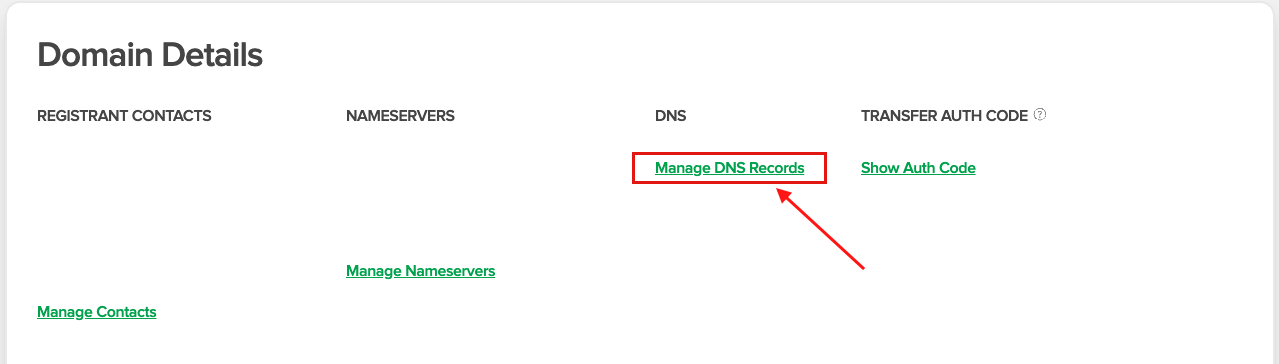
Look for Manage DNS Records or a similar link
On the DNS Records management screen, find the option to ‘add new DNS record'. There should be an option to select “TXT” as the record type. You will see fields to enter the details for the TXT record:
Host: Leave it blank or use "@" as we are setting the record for the root domain
Answer/Value: Paste in the TXT record from Meta (see Step 7—this should still be open in your original browser tab)
TTL (Time to Live): The default setting is typically fine. This determines how long the record is cached by DNS resolvers.
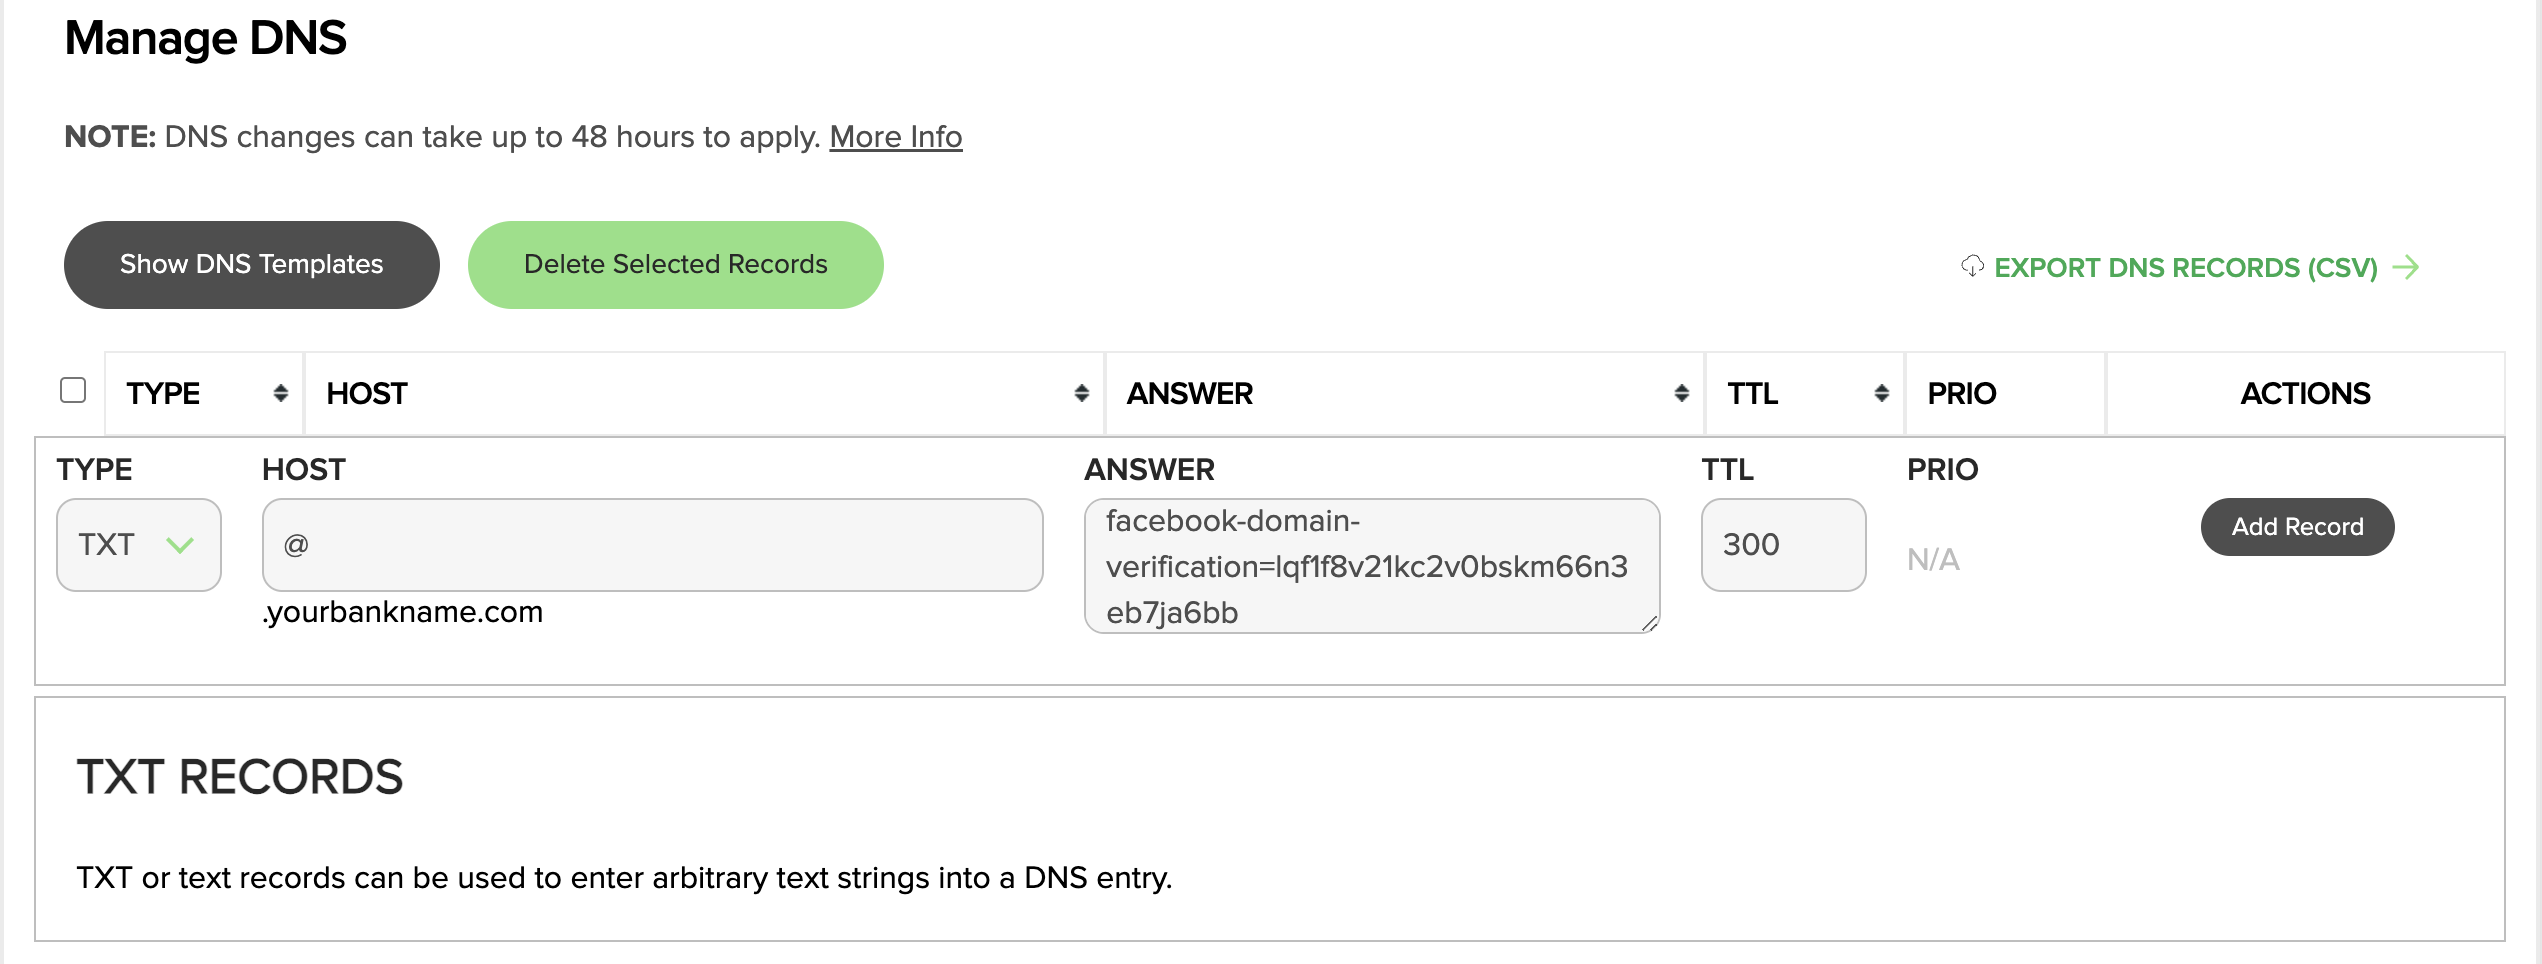
Click on Add Record to save the newly created TXT Record
Go back to the Domain Verification Page on Meta Business Settings (your original tab) and click Verify Domain
On successful verification, you will be greeted with a message like this:

Finally, you’ll need to provide us access.
How do I grant domain access to RAIN?
Go to Facebook Business Manager (business.facebook.com)
Click the Settings gear button at the bottom left
Go to Domains in the Brand Safety and Suitability section. (You may need to click Brand Safety and Suitability to get Domains to appear)
Find your verified domain, select it, then click on Assign partners
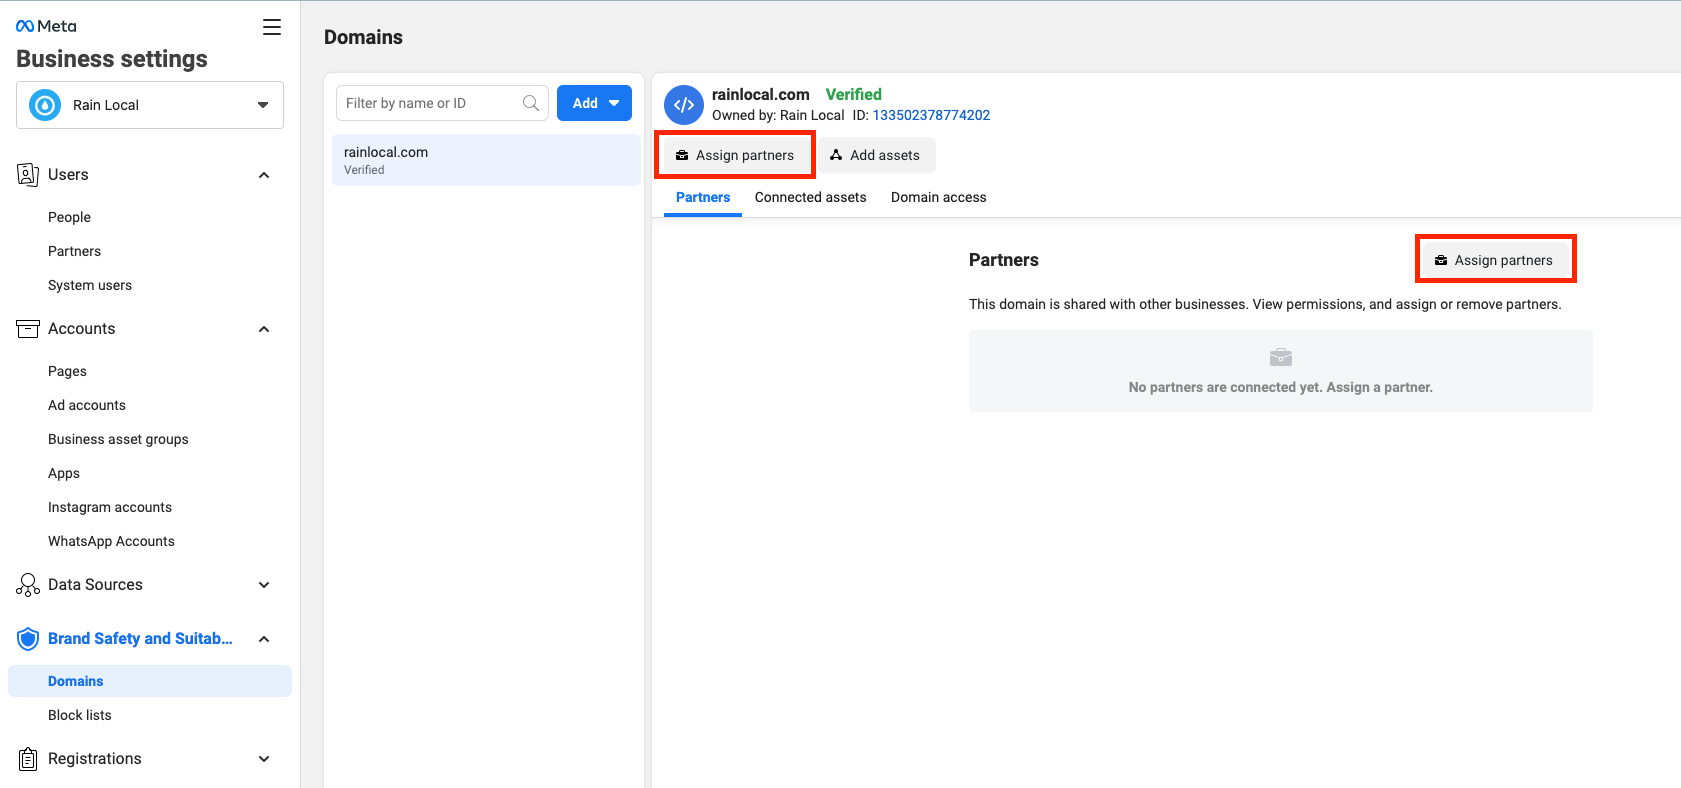
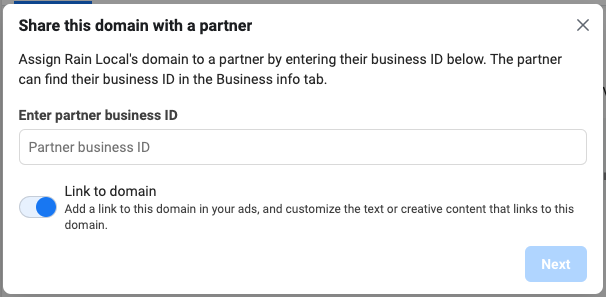
Enter RAIN’s business ID: 1371760926184551 in the pop-up window that appears.
Click on the Link to Domain option, then click Next
You’re all done! Please let us know once you’ve completed these steps, so we can confirm we’re all set from our end.
Troubleshooting
What if I don’t have the access I need in Facebook to begin the process?
If you’re unable to access Facebook Business Manager or don’t have full access, you will have trouble starting the process of verifying your own domain. But, don’t lose hope. We can help.
While owning your own verified domain is the recommended best practice, we can verify your domain for you (as long as nobody else has) and you won’t have to do anything else in Facebook. You will still have to add the DNS record (or add a HTML meta-tag to your website, if you’d prefer) — see steps 3-11 in the “How do I verify my domain?” section above.
If in the future, you would like to own your own verified domain in Facebook, just send us an email and we’ll remove it from our Business Manager, so that you can follow these instructions at that point and own it yourself!