
Google Tag Manager (GTM)
Google Tag Manager (GTM) is a tag management system (TMS). It allows you to add, update, and remove “tags” on your website or mobile app without having to edit code. Tags are small pieces of code that track website activity, such as clicks, page views, and downloads.
GTM offers a number of benefits over manually adding tags to your website including increased efficiency, accuracy, security, and collaboration. GTM is a powerful tool that can help you track a variety of different events on your website or mobile app.
The team of experts at RAIN will need to create tags and add them to your website’s GTM container to track customer events, including those resulting from your advertising campaigns.
Is GTM installed on my website?
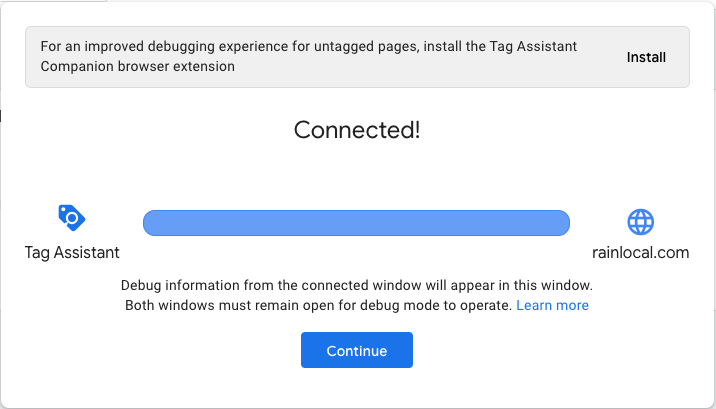
Open tagassistant.google.com on your web browser.
Click on Add domain, input your website URL in the dialog box, then click Connect.
The website will load in a new window. Meanwhile in the Google Tag Assistant window, you will see a “Connected!” message once the short process of debugging has been completed. You may now close the tab that the website loaded in.
On the top of the Tag Assistant window, you will now see all Google Tags installed on the website, if there are any.
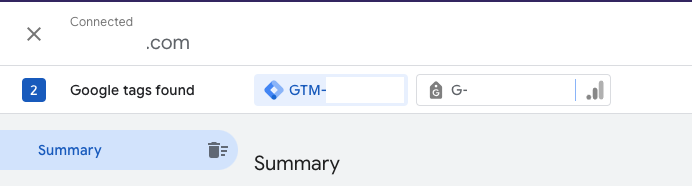
You should now be able to tell if you have GTM installed on your website or not.
If installed, you’ll see a Google Tag starting with “GTM-”. You’ll just want to check and make sure the ID you see in Tag Assistant matches the ID you see when you log in to your Google Tag Manager account.
Once you confirm that, we’ll just need access to the container! Steps for doing so can be found further down this page.
If you don’t see a GTM tag, you’ll need to install one. We can do that part for you, or you can find steps to do it on your own in the next section.
How do I install GTM on my website?
By default, if you need one, our team will create a new GTM container for you!
We’ll send you a couple code snippets for you to copy/paste into your website HTML code (step 5). Once you’ve done that, just let us know. We’ll verify everything looks good from our end, and then we’ll be off and running.
If you’d like to create the container yourself, no worries. Just follow the steps below.
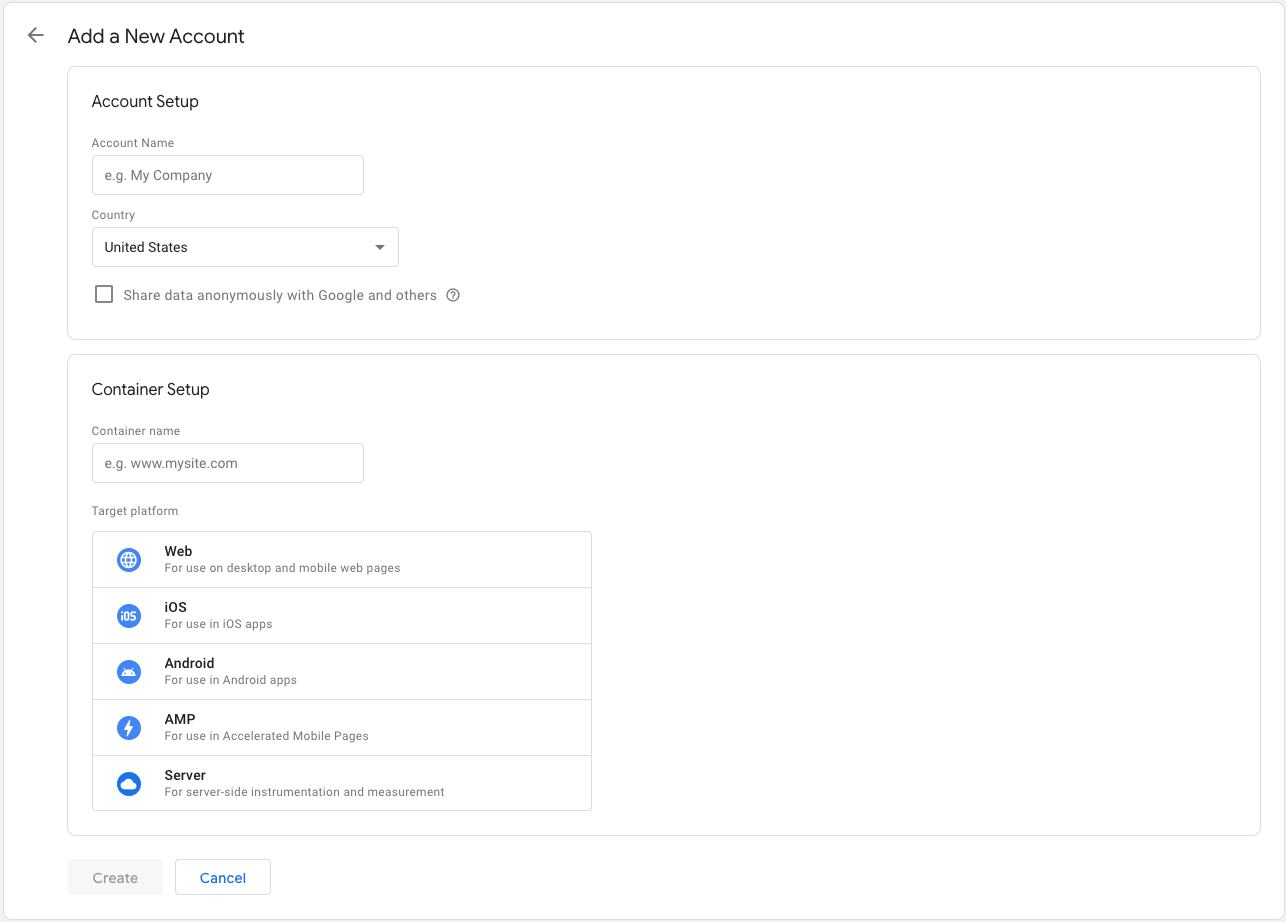
Go to tagmanager.google.com
Click Create Account
Fill in the fields under “Account Setup” and “Container Setup”
Select the relevant target platform from the list of options and click Create (You’ll need to accept the Terms of Service Agreement)
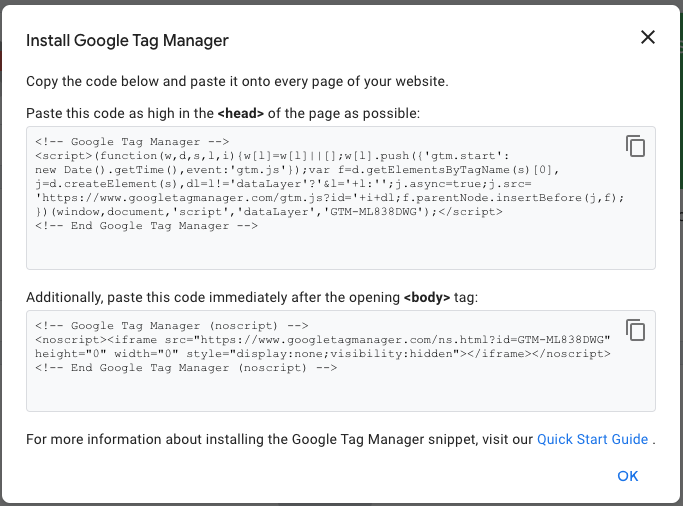
Once the Account and Container are created, on the next screen you will see a dialog box with two code snippets. You can copy and paste these in an email to your IT team. Please ask them to paste both code snippets on every page of your website:
Add the first code snippet to the <head> section
Add the second code snippet immediately after the opening <body> tag
Note: The code snippets in the screenshot below are for demonstration only. Copy the code you’re given on your screen.
Once you have installed the GTM code on your website, let’s verify that it's installed correctly.
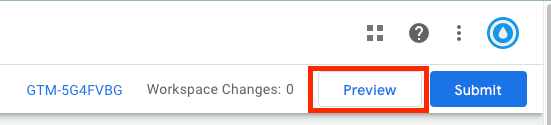
When you’re logged into your GTM container, find and click Preview. It should be next to your GTM ID in the top-right corner of the screen.
b. Enter your website’s full URL into the dialogue box. This will open a new tab in your browser where you can see the GTM code in action.
c. Alternatively, you could check using Google Tag Assistant as explained above in section: “Is GTM Installed on my Website?”
You’re done! Now that you’ve created a GTM container, you’ll just need to give us access to it. Follow the steps in the next section.
How do I provide GTM access to RAIN?
We’ll need you to grant us “Publish” access to your GTM. Here’s how:
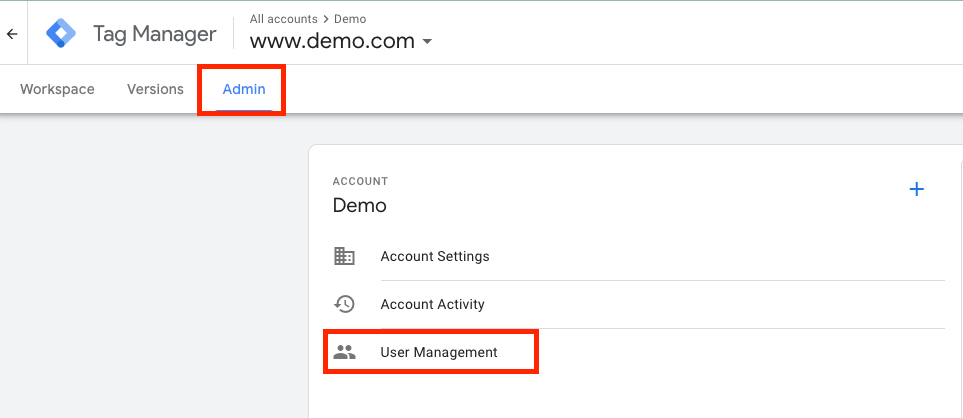
Log in to Tag Manager (tagmanager.google.com), and select the account container for your website
Click on the Admin tab
Under the Account section, click on User Management
Click on the blue ✚ icon, then click the Add users option
Enter analytics@rainlocal.com in the email address field
Note: Clients of RAIN who have provided Google Analytics or GTM access to us prior to September of 2023 most likely sent the invitation to support@rainlocal.com. If so, please send additional required access to support@rainlocal.com again. If you are a new client as of September 2023 or more recent, please send your invitation to analytics@rainlocal.com
Under Account Permissions, select User access
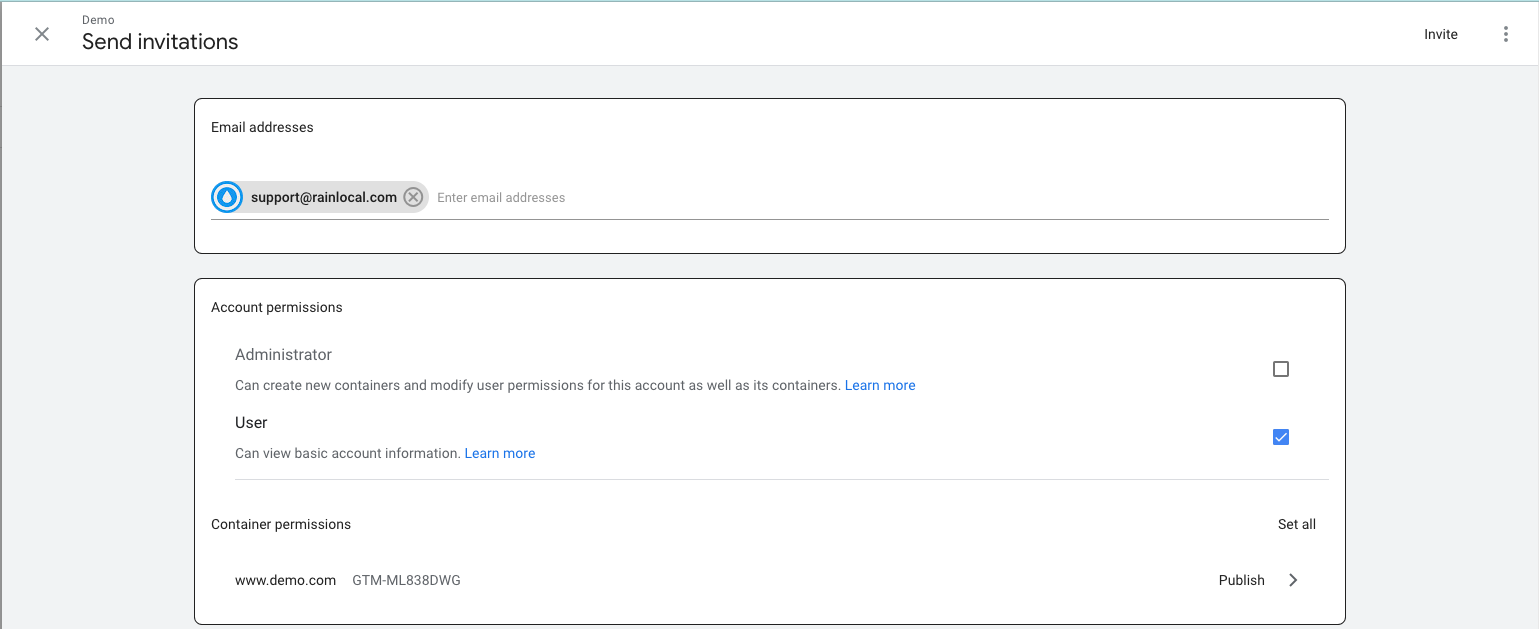
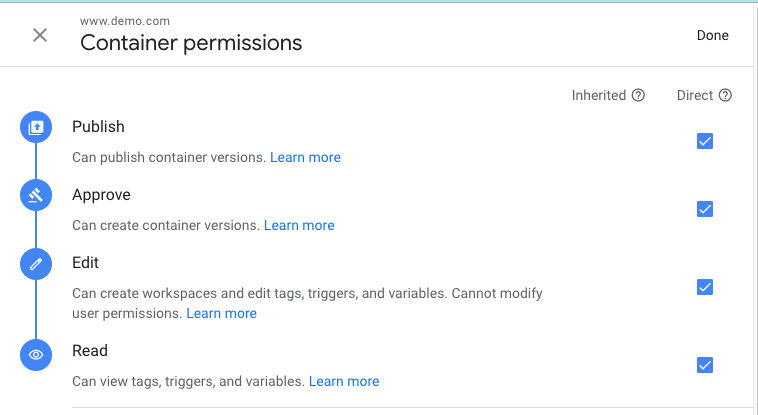
Under Container Permissions, select Publish access such that all the checkboxes are checked automatically. With Publish access, we’ll be able to create and publish tags onto your website.
Finally, click Invite
You’re all done! Please let us know when you’ve completed these steps, so that we can confirm that everything looks good from our end.
Thank you!
If you’d like to read up further on GTM set-up and other related topics, here’s a helpful article from Google.