
Google Analytics 4
Google Analytics 4 (GA4) is the latest version of Google Analytics. It is designed to be more flexible, scalable, and privacy-focused than the previous version, Universal Analytics (UA). GA4 collects data from both websites and apps, and uses event-based data instead of session-based data. This makes it more accurate and reliable for measuring cross-platform user behavior.
With access to your GA4, we will be able to track and measure the traffic we’re driving to your website along with the actions being taken by customers on your website. With this information, we can more fully understand the impact of your marketing efforts. Without it, we’re sure we’ll make a difference for you, but it’ll be harder to quantify and build on over time.
Is GA4 already set up on my website?
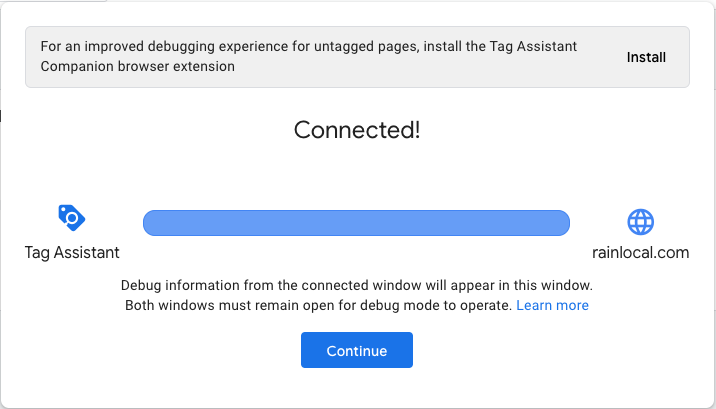
Open tagassistant.google.com on your web browser.
Click on Add domain, input your website URL in the dialog box, then click Connect.
The website will load in a new window. Meanwhile in the Google Tag Assistant window, you will see a “Connected!” message once the short process of debugging has been completed. You may now close the tab that the website loaded in.
On the top of the Tag Assistant window, you will now see all Google Tags installed on the website, if there are any.
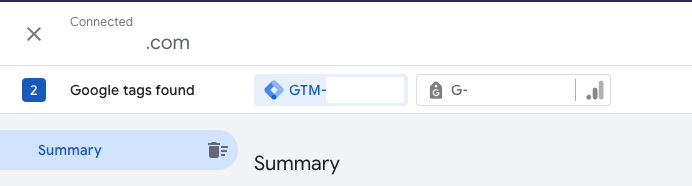
You should now be able to tell if you have GA4 installed on your website or not.
If installed, you’ll see a Google Tag starting with “G-”. You’ll just want to check and make sure the ID you see in Tag Assistant matches the ID you see when you log in to your Google Analytics account.
Once you confirm that, we’ll just need access! Steps for doing so can be found further down this page.
If you don’t see a GA4 tag, you’ll need to install one using Google Tag Manager. You can find steps to do so in the next sections in this article.
How do I create a GA4 Property?
Go to the Google Analytics website to get started. Link: analytics.google.com/analytics/web/
Sign into your Google account
Please note, the Google Account used to sign in will “own” the GA4 created in the process. Ownership is transferable
If you are new to GA4, you will see a welcome screen. Click on Start Measuring
On the next screen, fill in the Account Name, Property Name, Time Zone, Business Details and Objectives, then accept the Terms of Service Agreement to continue.
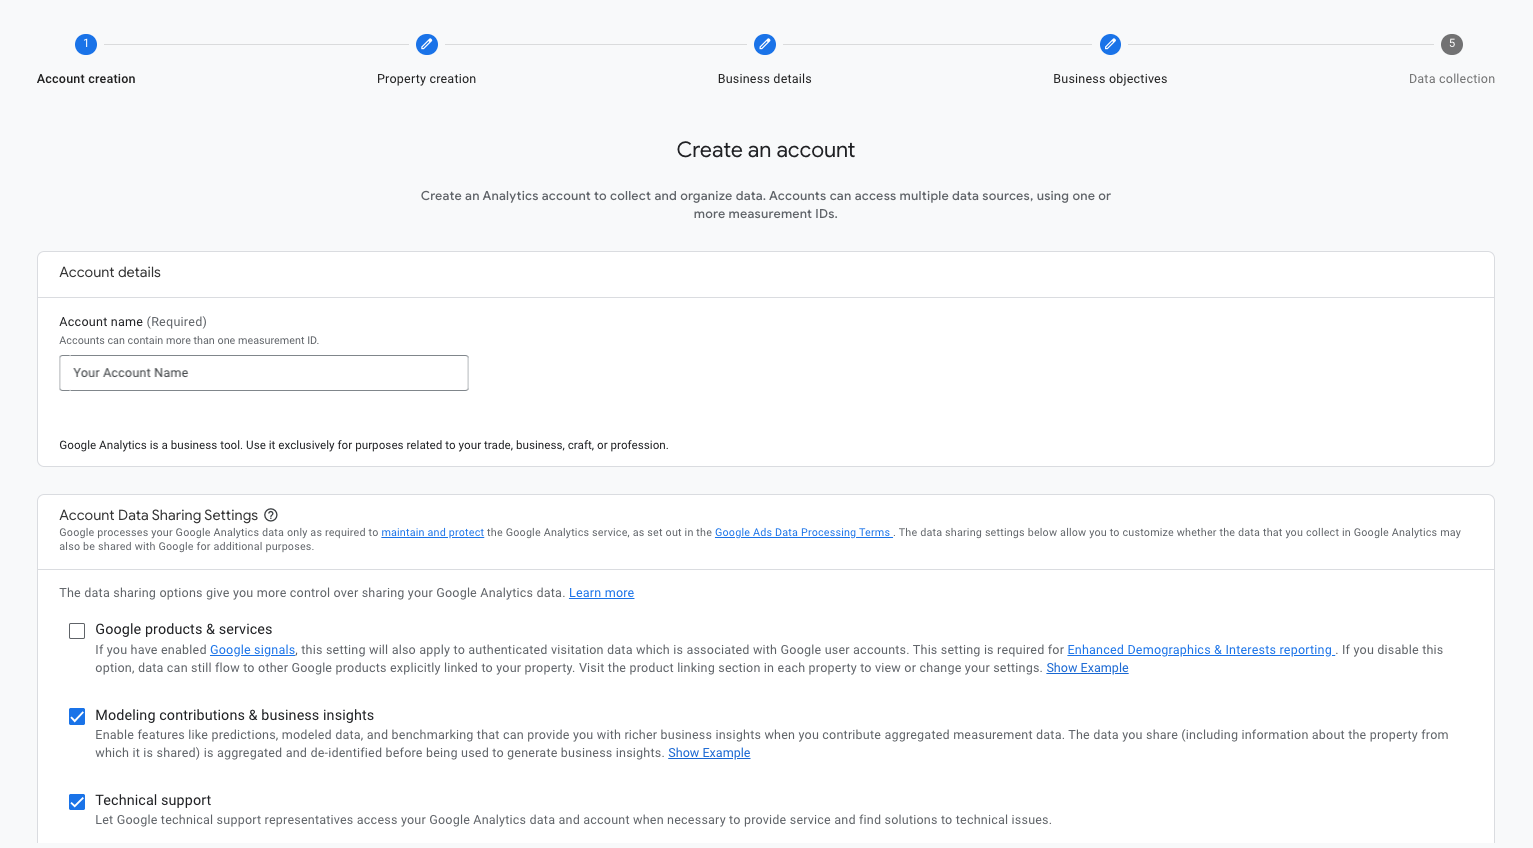
We recommend making your Account Name the name of your institution, e.g. “A1 Bank.” You can set up multiple properties under this one GA4 Account, which can each be named differently.
We would recommend naming this first property “Main Website” unless you already have a property set up for your main website, and you’re now wanting to create one for your “Application Page” or something else.
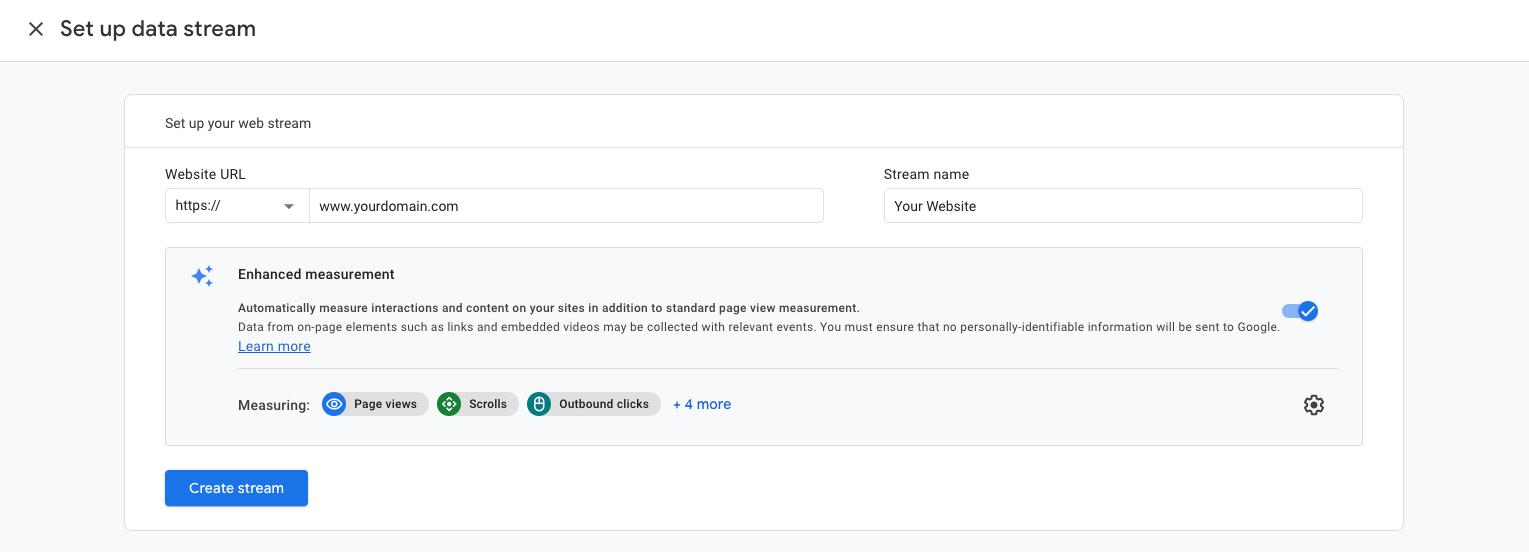
On the Data collection screen, select the platform this GA4 will measure activity on, then set up the data stream by filling in the Website URL
Please note, these instructions do not cover the steps required for setting up GA4 for an app
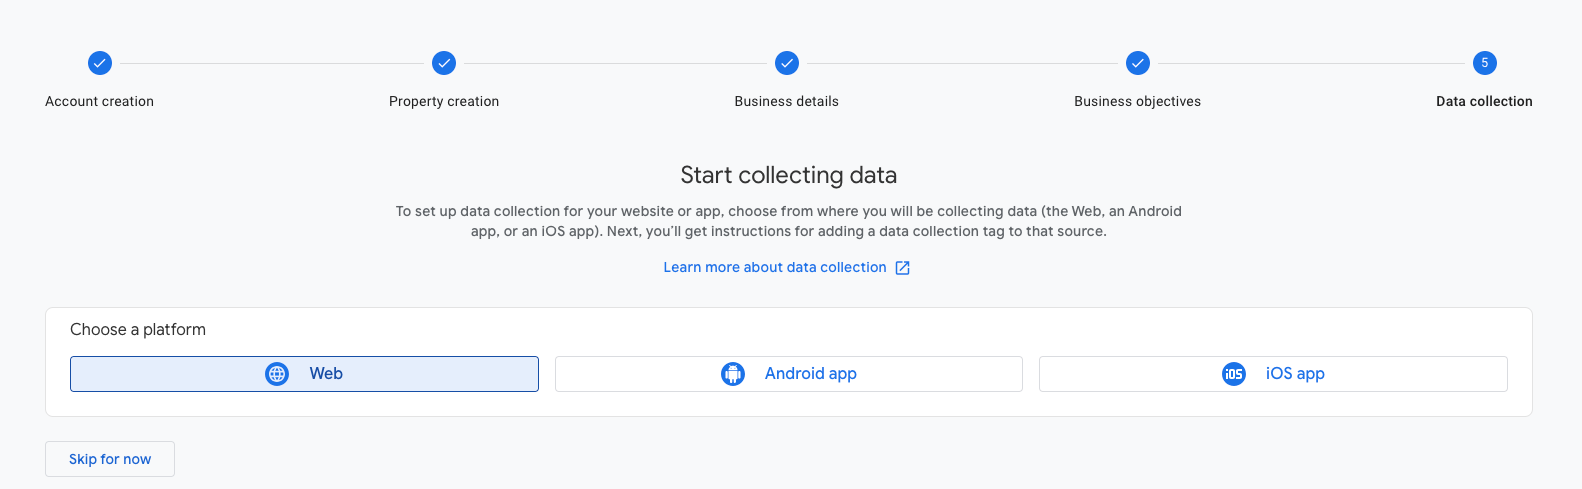
Make sure to toggle Enhanced measurement ON. This will help speed up the process of setting up your GA4 Property to track relevant, helpful data from your website traffic.
You’ve completed the Account Creation process and created a GA4 property.
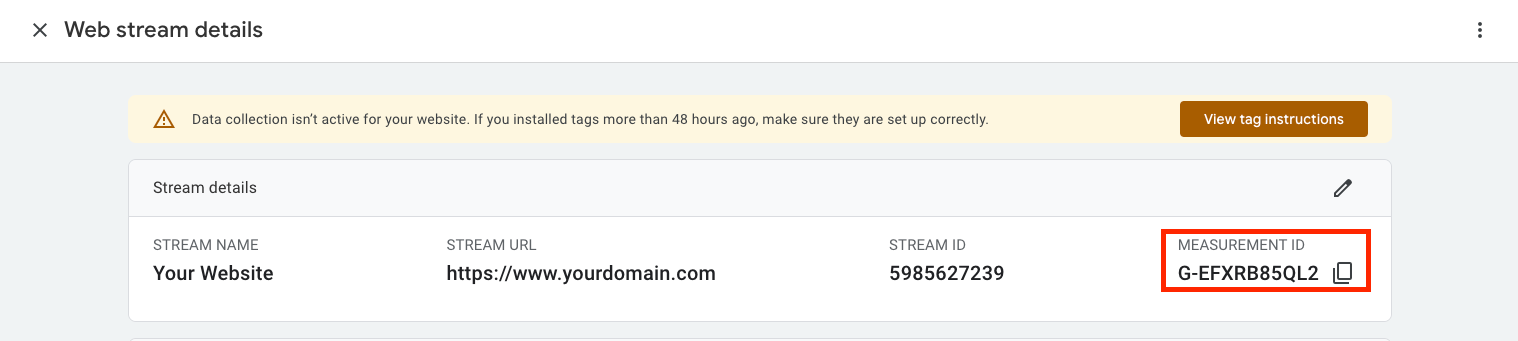
If you’re going to continue on right away to installing GA4 on your website, copy your Measurement ID from the Stream details page now. (See screenshot in Step 1 of “How do I install GA4 on my website” below)
It’s now time to install your GA4 property tag on your website using Google Tag Manager…
How do I install GA4 on my website?
There are 2 ways to install GA4 on your website: manually (“hardcoding”), or using a tag management service like Google Tag Manager (GTM). GTM is the highly preferred method for several reasons. Below are the instructions on how to use GTM to install GA4 on your website.
If you haven’t already, start by copying the Measurement ID from the Stream details page in Google Analytics
If you’re not on that page anymore, you can find it by logging into Google Analytics, selecting your account, going to Admin, clicking on Data Streams, and then clicking on your Measurement ID. Your screen should look similar to the screenshot below
Log in to the GTM Container installed on your website (If you don’t have one yet, refer to these instructions)
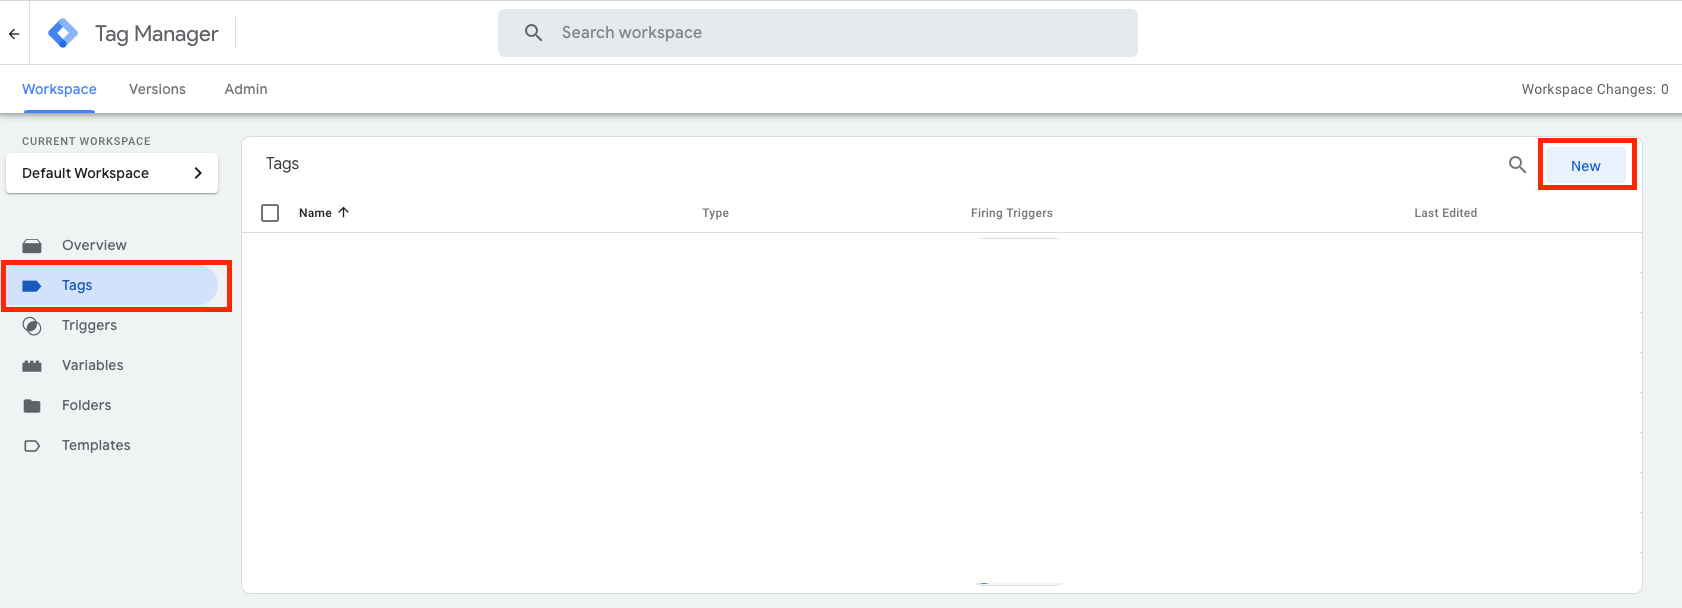
Click on Tags in the Workspace tab, then click New
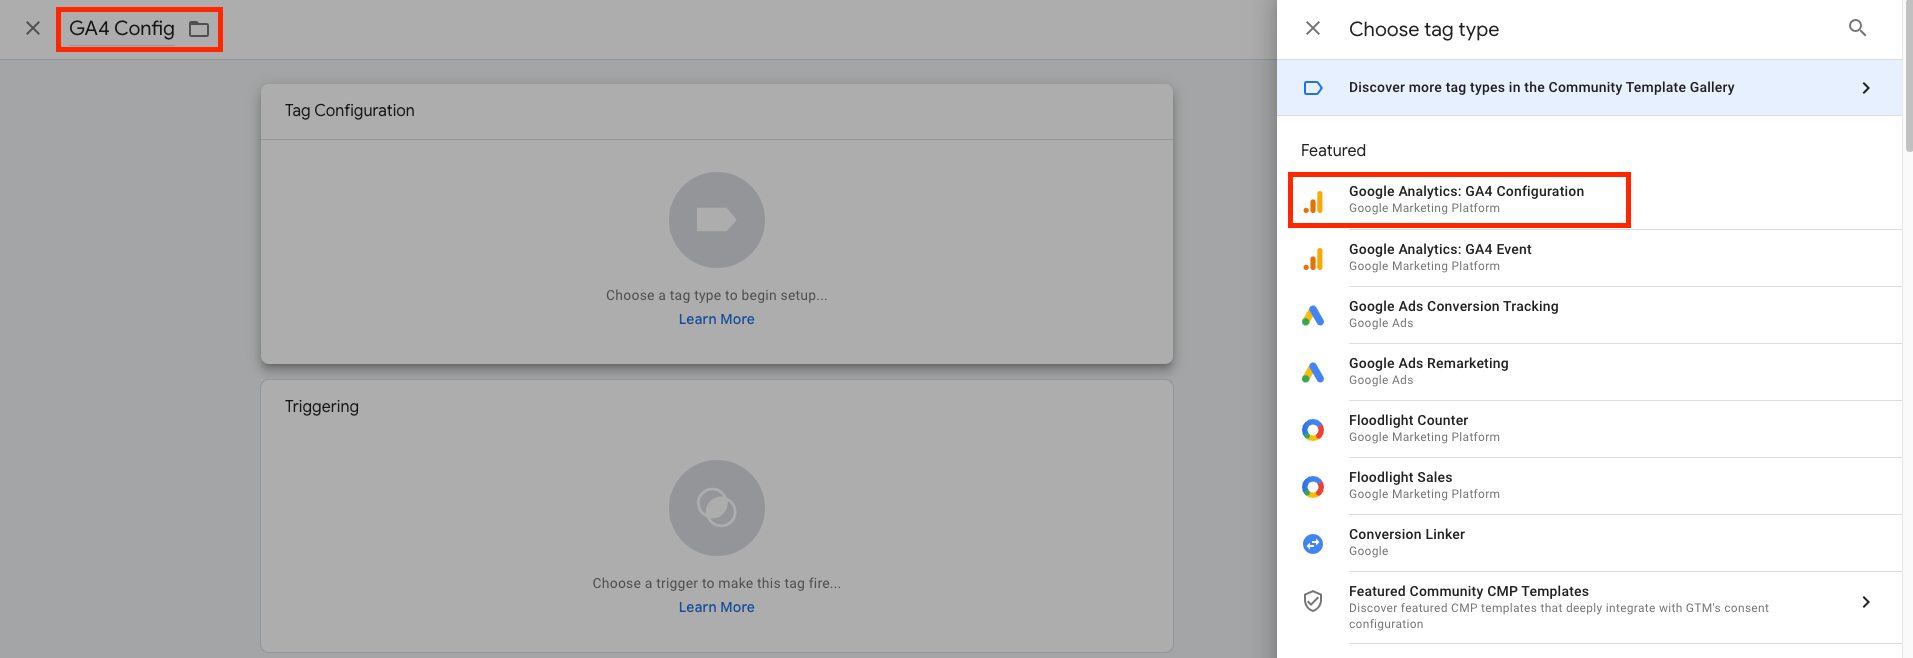
At the top, write in a name for your tag. We recommend “GA4 Config” or something similar
Click Tag Configuration and select Google Analytics: GA4 Configuration from the list
Paste in the Measurement ID that you copied before
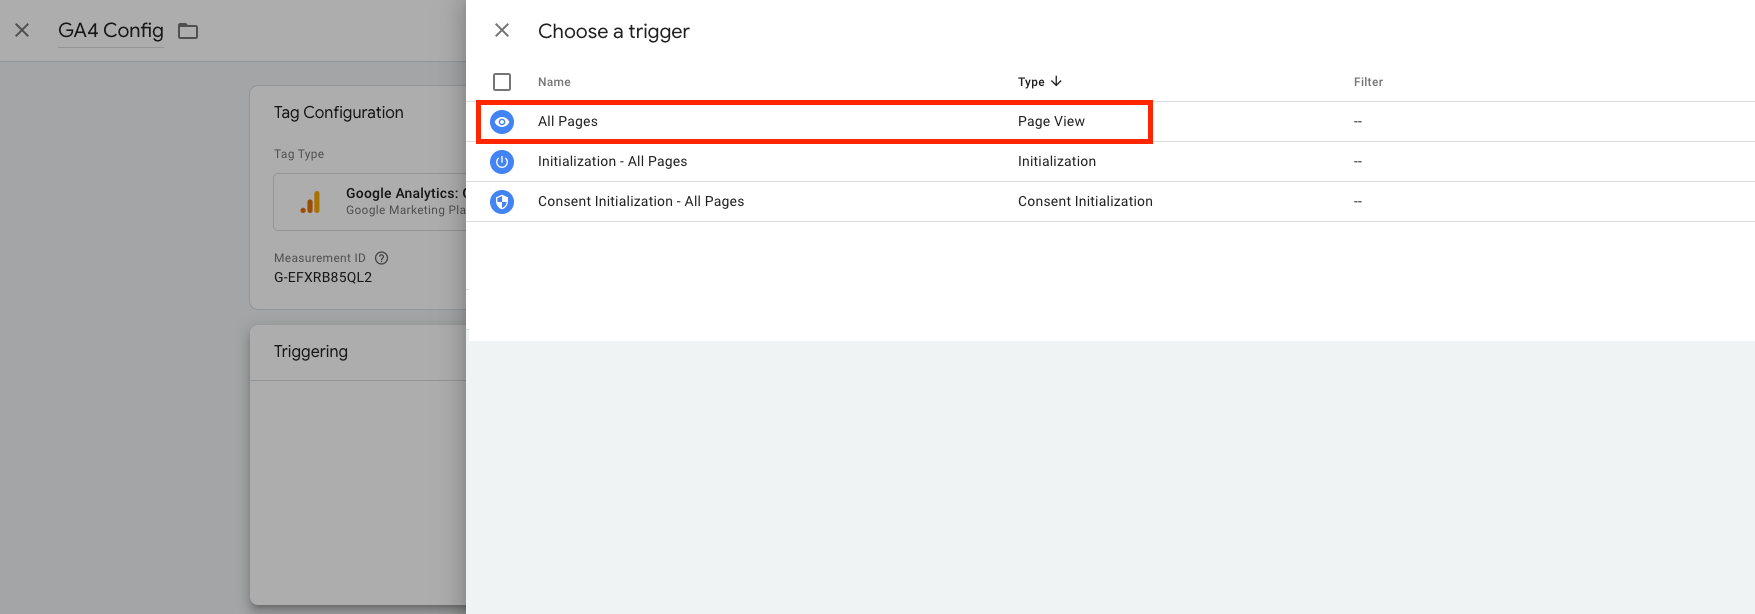
Click Triggering and select All Pages from the list of options
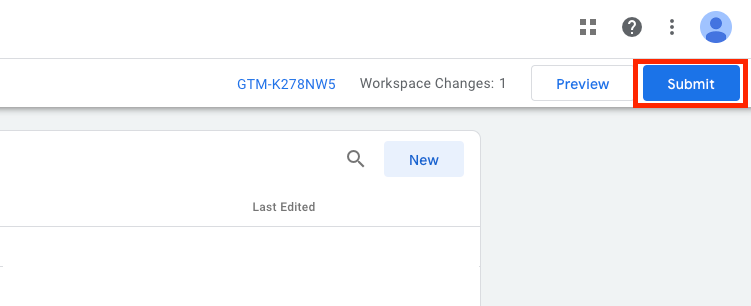
Click Save, then publish the tag to your website by clicking Submit
You have now installed GA4 on your website! You can expect to see traffic data flow into your GA4 property within the next few hours. The next and final step is to provide us access so that we can use the data to quantify and strengthen your marketing efforts.
How do I grant GA4 access to RAIN?
Log into Google Analytics
Click the Admin gear button at the bottom left
In the Property section, click Property Access Management
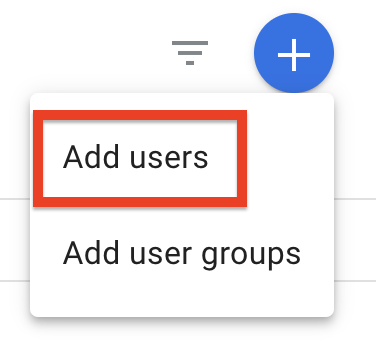
Click the blue ✚ button, then select Add users
Enter analytics@rainlocal.com into the email field
Note: Clients of RAIN who have provided Google Analytics or GTM access to us prior to September of 2023 most likely sent the invitation to support@rainlocal.com. If so, please send additional required access to support@rainlocal.com again. If you are a new client as of September 2023 or more recent, please send your invitation to analytics@rainlocal.com
Select Editor access
Click Add
Please let us know once you’ve completed these steps so we can confirm everything looks good from our end.
Thank you!